Setting up HTTP/2 on apache web server: Quick and easy
In the era of high speeds and growing demands on web resource performance, the use of the HTTP/2 protocol is becoming not just a desirable option, but a necessity. This protocol significantly improves page loading speed, optimizes data transfer, and improves user experience.
If your web server runs Apache, you'll find it helpful to learn how to enable HTTP/2 and configure it for maximum performance.
In this article, we will walk you through the process of enabling HTTP/2 on the Apache web server, from checking compatibility to configuring settings.
The article on the page is based on my many years of experience with this technology and is presented to you as a small instruction, but if you want to get acquainted with it in more detail, then I recommend you go to the official Apache documentation.
The main advantages of the HTTP/2 protocol over HTTP/1.1.
- HTTP Headers Compression.
- Push technologies.
- Parallel loading of page elements.
- A binary protocol, unlike HTTP 1.1, which is plain text.
HTTP/2 protocol can be used only if you have Apache web server not lower than version 2.2. Therefore, if your Apache version is lower than 2.2, you first need to update Apache to a compatible version. In order to enable HTTP/2 protocol, you need to have two modules before Apache, the first is mod_http2, and the second is mod_ssl.
Contents of the article:
- Installing the mod_http2 module.
- Installing the mod_ssl module.
- Checking whether HTTP/2 is enabled.
- Check if the HTTP/2 module is enabled in Apache.
- Enable HTTP/2.
- Checking the result.
1. Installing the mod_http2 module.
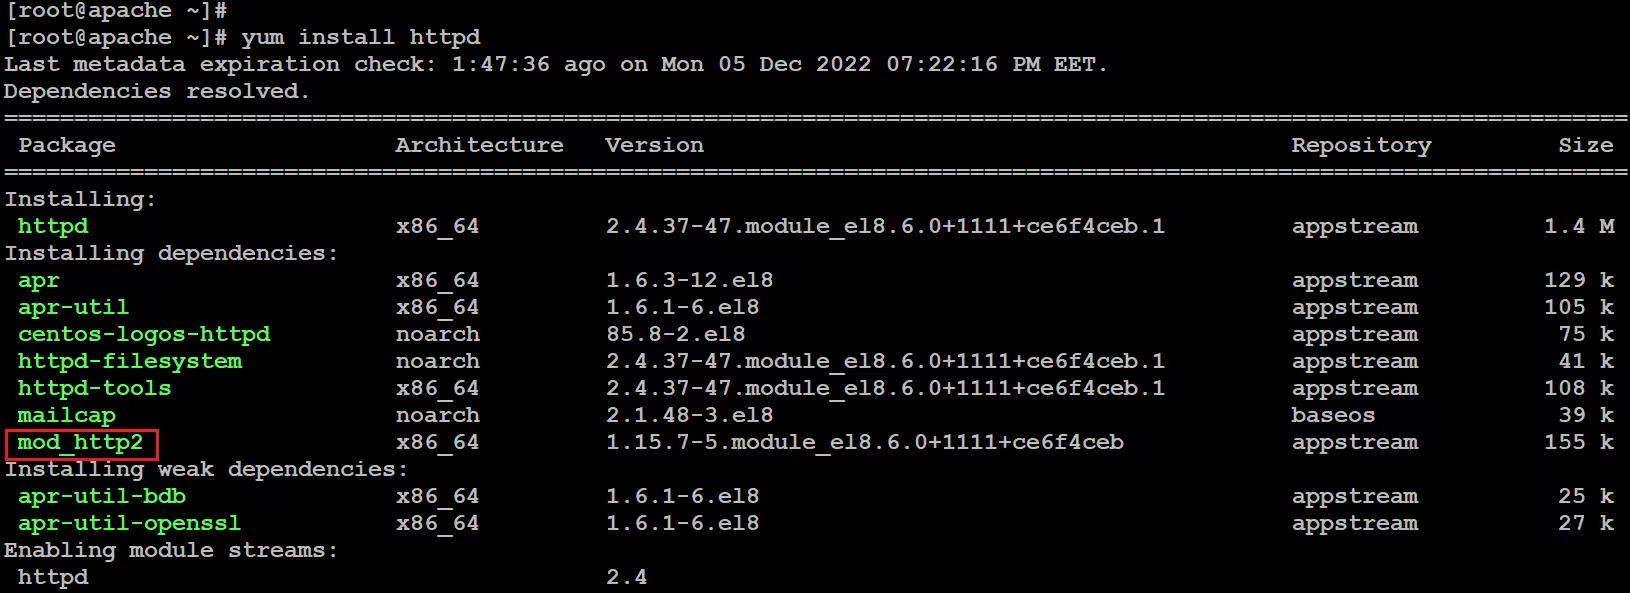
When you install Apache web server, mod_http2 module should be installed along with the web server as a dependency.

If the mod_http2 module is not included as a dependency, you will need to install it separately. To install, use the command:
$. sudo yum install mod_http2
2. Installing the mod_ssl module.
mod_ssl adds support for the SSL/TLS protocol, providing a secure encrypted connection between your site and the client's browser. It is necessary for protecting data transmitted over the Internet and plays a key role in ensuring the confidentiality, integrity, and authenticity of information. Without mod_ssl, it is impossible to set up a secure connection, which is a standard in modern web development.
To install the mod_ssl module, use the command:
$. sudo yum install mod_ssl

If you do not plan to use an SSL certificate on your site, you do not need to install mod_ssl.
3. Checking whether HTTP/2 is enabled.
Before setting up HTTP/2, let's first make sure that HTTP/2 is not currently running. The command to check is:
$. curl --http2 --head http://localhost | grep HTTP

As we can see, we currently use only the HTTP/1.1 protocol.
4. Check if the HTTP/2 module is enabled in Apache.
At this stage, you need to make sure that the HTTP/2 module is loaded during Apache startup. To check, use the command:
$. cat /etc/httpd/conf.modules.d/10-h2.conf

As a result, you should get - LoadModule http2_module modules/mod_http2.so. This means that the module is loaded during Apache startup.
5. Enable HTTP/2.
Now it's time to enable the HTTP/2 protocol.
If you do not use virtual hosts, then you need to open the main Apache configuration file httpd.conf, which is located at /etc/httpd/conf, and at the beginning of the file, write the line:
Protocols h2 h2c http/1.1

Well, if you use virtual hosts, then you need to open the configuration file of your site and enter the same parameter into it.
<VirtualHost ...>

    ServerName techwiki.net

    Protocols h2 h2c http/1.1

</VirtualHost>
Afterwards, save the file and be sure to restart the Apache web server.
$. service httpd restart
Descriptions of protocol parameters.
- h2 - tells the Apache server to support HTTP/2 over SSL/TLS.
- h2c - tells the Apache server to support HTTP/2 over TCP.
- http/1.1 - tells the server that if the client does not accept HTTP/2, then serve the request via the HTTP/1.1 protocol.
6. Checking the result.
After everything we have done, let's now check the result, for this we will use the same command that we used in the third point.
$. curl --http2 --head http://localhost | grep HTTP

As we can see, as a result, the HTTP/2 protocol now works successfully on our site.
Enabling HTTP/2 in Apache is a relatively simple process that can significantly improve the speed and performance of your site. We've covered all the key steps, from checking your Apache version and HTTP/2 support to making configuration changes and testing the results.
Using HTTP/2 allows your site to load pages faster, manage connections more efficiently, and provide a better user experience. If you want to keep up with modern web standards, setting up HTTP/2 is a must-do step towards success.
