How to Install PostgreSQL 17 from Source on Linux
PostgreSQL is a very powerful, reliable and freely distributed database management system that supports a wide range of capabilities for working with data. With the release of PostgreSQL 17, the DBMS developers have improved performance, added new features and increased system security.
In this article, we will look at the step-by-step process of installing PostgreSQL 17.1 on the Linux operating system. We will go through all the stages from creating a user at the operating system level to building a database from source code, so that everyone, even a novice user, can quickly install and configure the database for their needs. Installing PostgreSQL from source code will allow you to gain maximum control over the configuration process, customize the system to your needs, and use the latest versions of the program.
I will perform all actions on the CentOS 9 platform, but don’t worry if you use, for example, Ubuntu or Debian, all commands will work the same on all Linux platforms.
The article on the page is based on my many years of experience with this technology and is presented to you as a short instruction, but if you want to get acquainted with it in more detail, then I recommend that you go to the official documentation on PostgreSQL.
Contents of the article:
- Installing packages.
- Create user and group postgres.
- Creating directories for a database cluster.
- Assign rights to the postgres user.
- Download the PostgreSQL DBMS archive.
- Unpacking the archive.
- Building PostgreSQL DBMS.
- Initializing a PostgreSQL cluster.
- We edit the access file pg_hba.conf.
- We edit the postgresql.conf file.
- Creating environment variable files.
- We launch the cluster.
1. Installing packages.
The first step is to prepare the system for installing the PostgesSQL DBMS, namely, install all the necessary packages and dependencies on our CentOS 9, without which we will not be able to assemble the cluster. To install packages and dependencies, use the command:
~# dnf install gcc zlib-devel readline-devel make libicu libicu-devel bison flex perl docbook-dtds docbook-style-xsl openjade
We install packages from under the root account or so that your account has the ability to run commands with sudo rights.
Package assignments:
- gcc: A compiler for assembling programs.
- zlib-devel: Files for working with data compression.
- readline-devel: Files for command line editing.
- make: Utility for automating assembly.
- libicu: Support for working with Unicode and locales.
- libicu-devel: files for development with ICU.
- bison: Parser generator.
- flex: Lazer generator.
- perl: Scripting language.
- docbook-dtds: DTD document.
- docbook-style-xsl: XSL styles.
- openjade: XML processor.
2. Create user and group postgres.
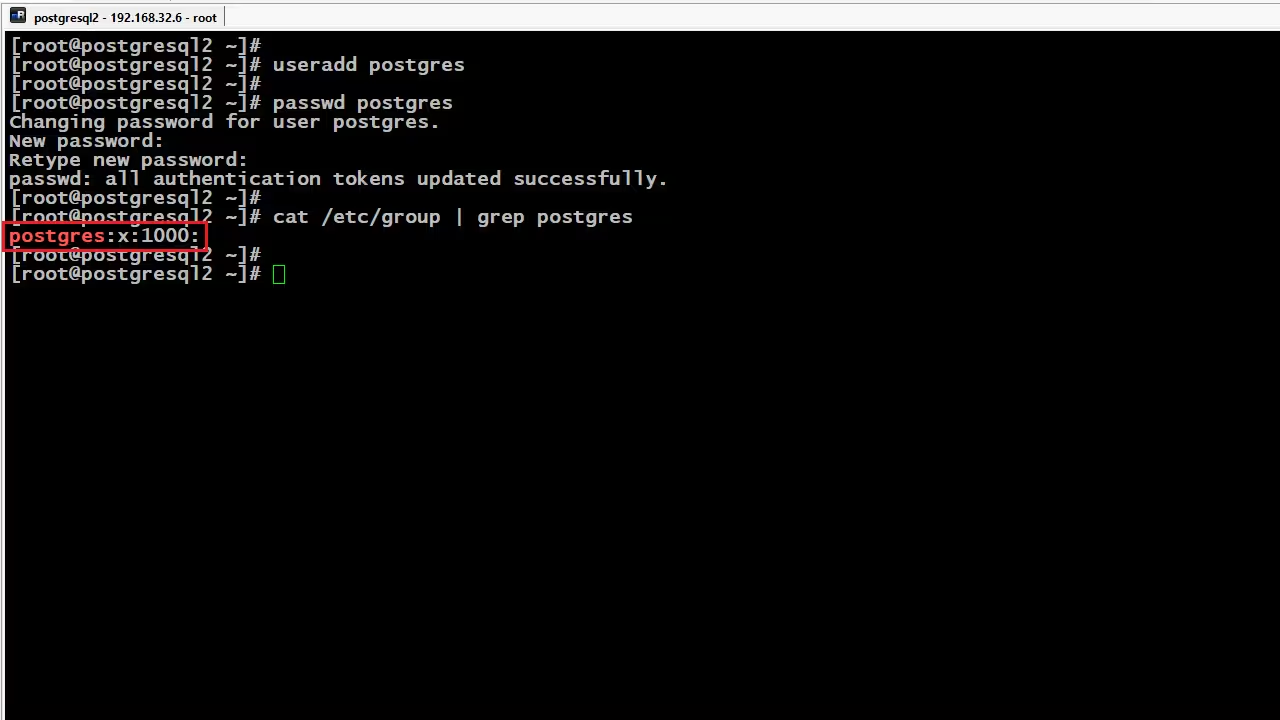
To ensure security and isolation of PostgreSQL processes, a separate user and group are created in Linux. This prevents unauthorized access to data and simplifies rights management. According to the rules of the PostgreSQL DBMS, all database cluster processes must run under the postgres account.
Create a user and group postgres with the command:
~# sudo useradd postgres
We set a password for the postgres user using the command:
~# passwd postgres
3. Creating directories for a database cluster.
To store the PostgreSQL database, you need to create a separate directory. This is important for data organization, performance, and security.
Create directories.
The pg_home directory will store the necessary utilities for managing the entire PostgreSQL database cluster.
~# mkdir -p /app/postgresql/17.1/pg_home
The pg_dbcluster_1/data directory will store the data for the entire cluster.
~# mkdir -p /app/postgresql/17.1/pg_dbcluster_1/data
The pg_dbcluster_1/log directory will store cluster logs.
~# mkdir -p /app/postgresql/17.1/pg_dbcluster_1/log
4. Assign rights to the postgres user.
PostgreSQL runs under a specific user, in our case the account is called postgres. Make sure the directory permissions are set correctly.
~# chown -R postgres:postgres /app/postgresql
We now perform further actions from under the postgres account.
5. Download the PostgreSQL DBMS archive.
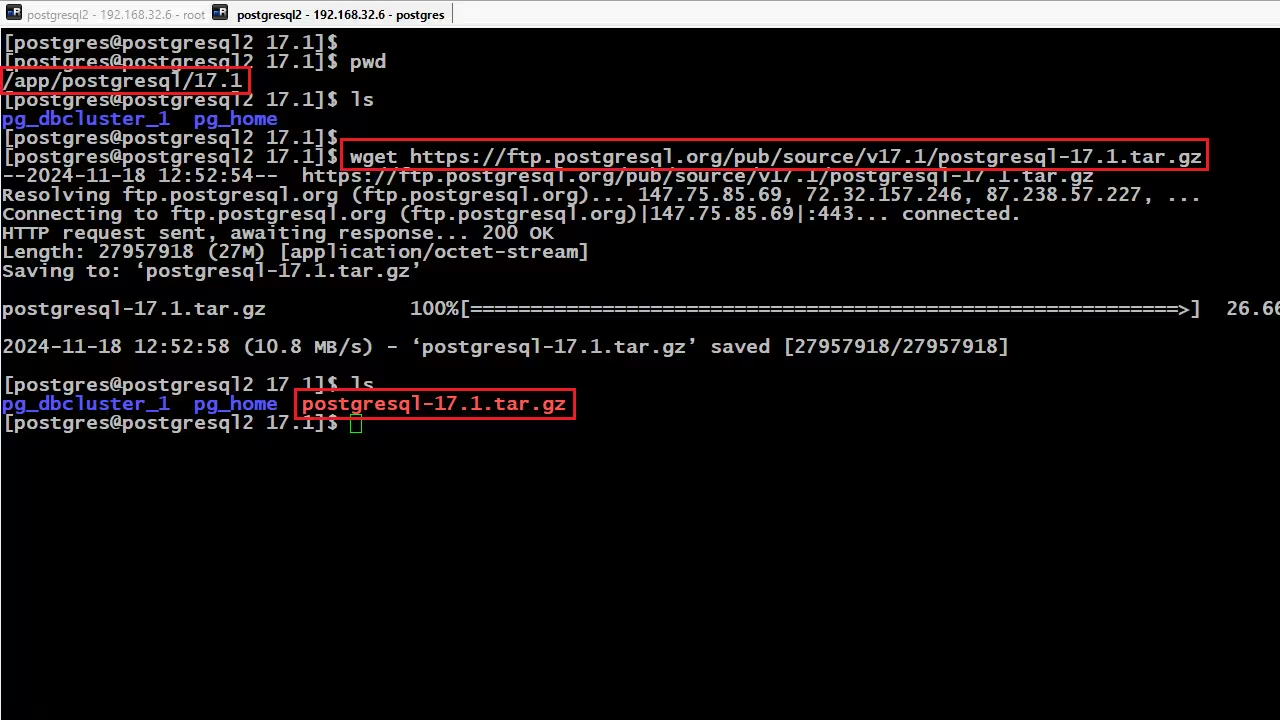
It's time to download the archive with the PostgreSQL DBMS from the official website. We will download using the wget utility and into the /app/postgresql/17.1 directory.
Link to the official distribution:
https://www.postgresql.org/ftp/source/v17.1/
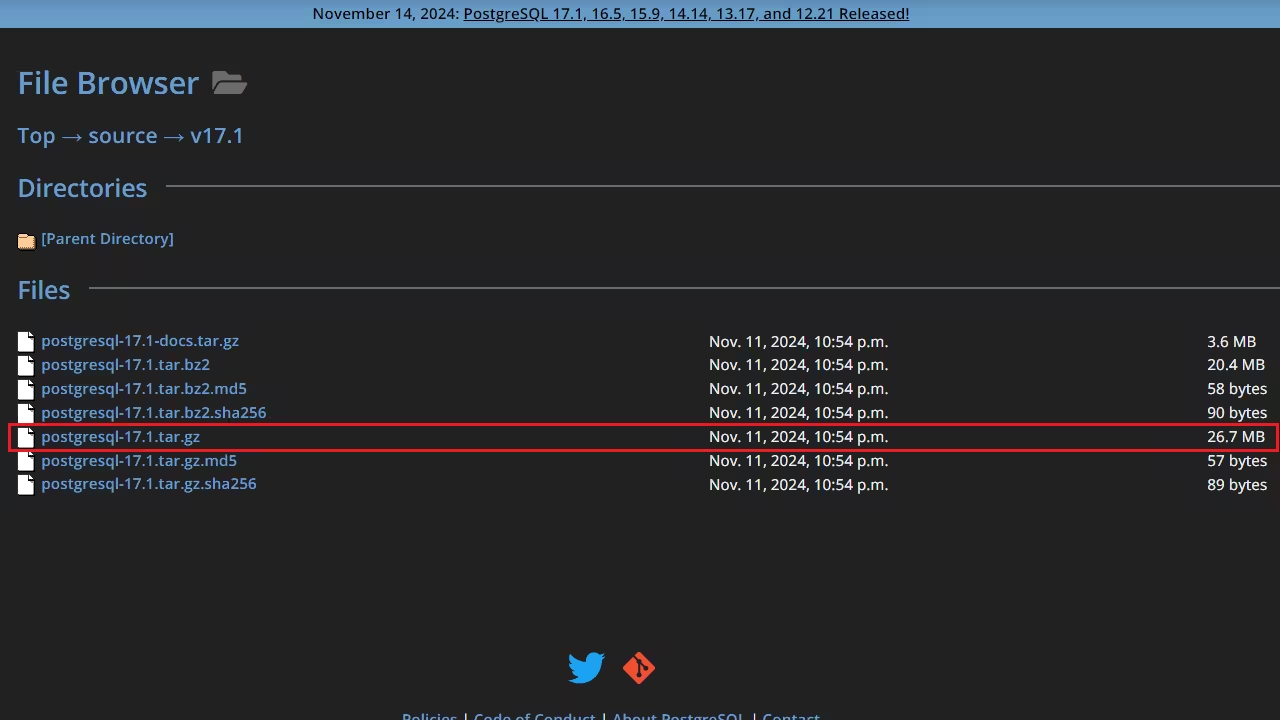
Command to download the distribution:
~$ wget https://ftp.postgresql.org/pub/source/v17.1/postgresql-17.1.tar.gz
6. Unpacking the archive.
After downloading, you need to unpack the downloaded archive. To unpack the archive, use the command:
~$ tar -xvf postgresql-17.1.tar.gz
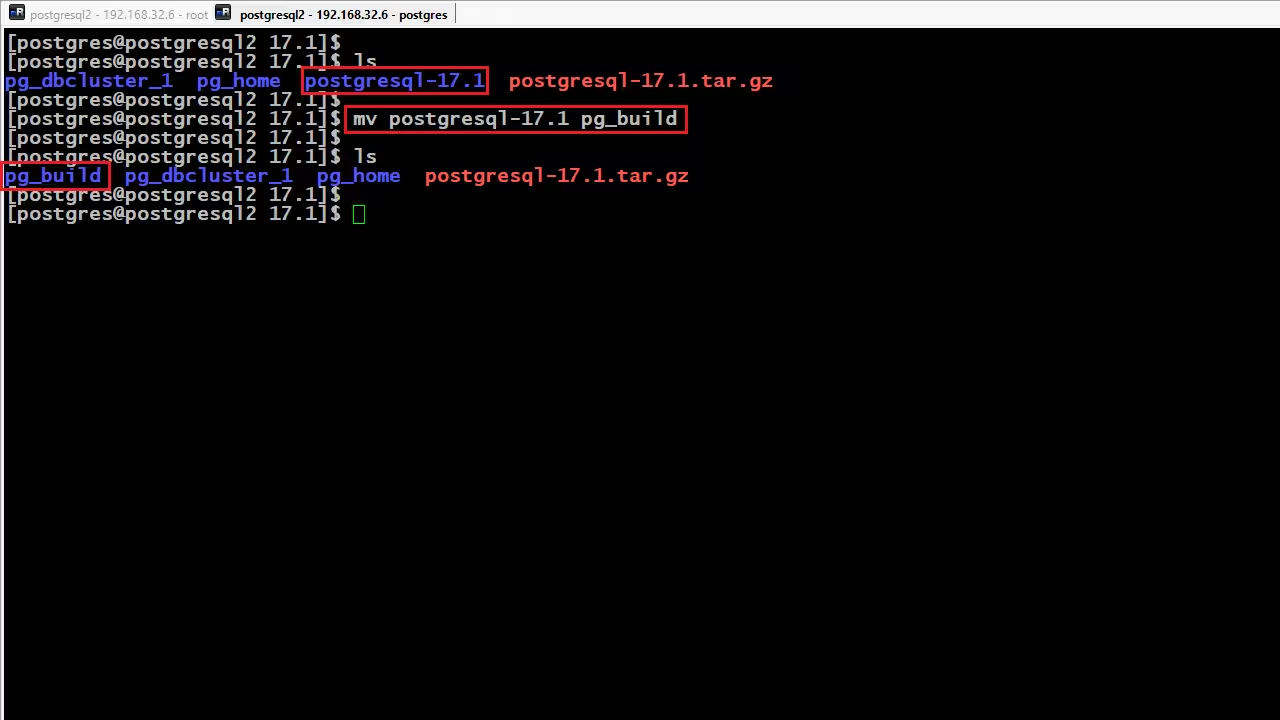
After unpacking the archive, rename the directory with the original data to pg_build.
~$ mv postgresql-17.1 pg_build
7. Building PostgreSQL DBMS.
Now it's time to start assembling our DBMS from the source code. To prepare for assembling the DBMS, we use the command:
~$ ./configure --prefix=/app/postgresql/17.1/pg_home
./configure - This is a script that will check your system (operating system, compilers, libraries, etc.) and create a configuration for further compilation of the source code.
--prefix=/app/postgresql/17.1/pg_home - Specifies the directory where PostgreSQL will be installed after running the make install command.
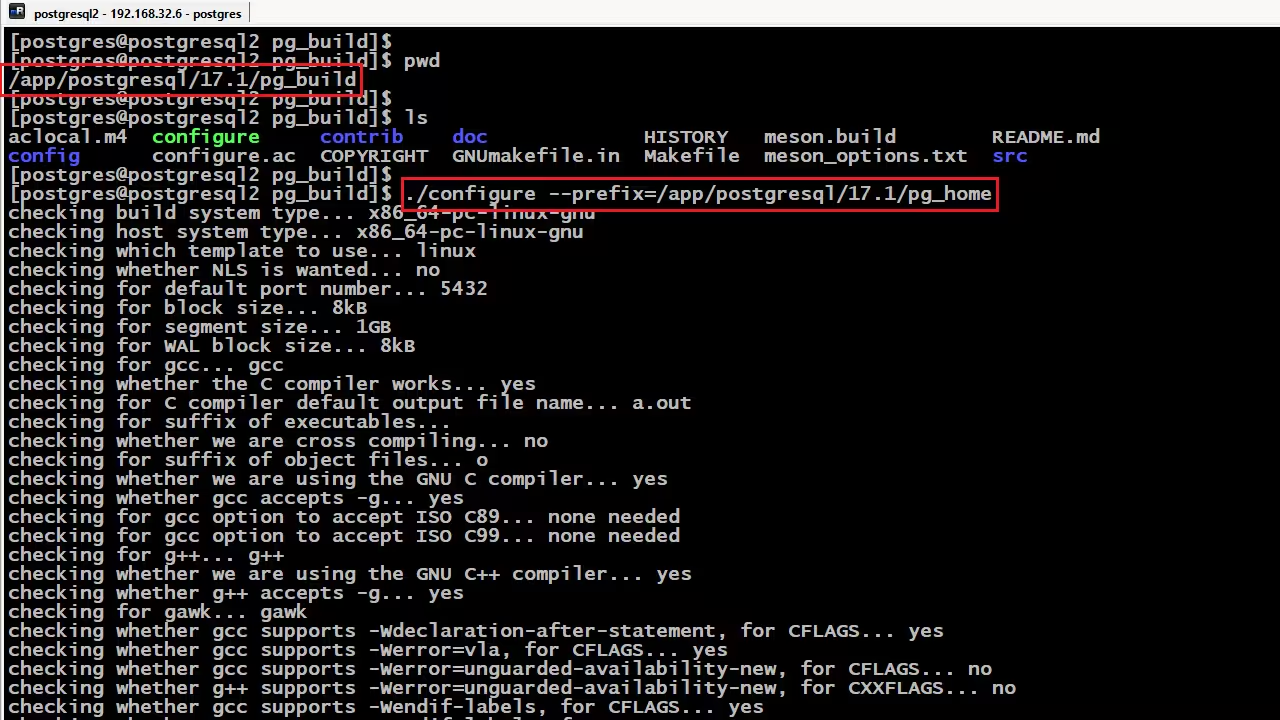
If the check is successful, we start building all PostgreSQL components with the command:
~$ make world
After assembly, we start the PostgreSQL installation process.
~$ make install-world
8. Initializing a PostgreSQL cluster.
After assembling the DBMS, we can now initialize the cluster, using the initdb utility for this. The initdb command is used to initialize a new PostgreSQL database cluster.
~$ /app/postgresql/17.1/pg_home/bin/initdb -D /app/postgresql/17.1/pg_dbcluster_1/data/ -U postgres -W
-D /app/postgresql/17.1/pg_dbcluster_1/data/ - Specifies the path to the directory where the PostgreSQL cluster data structure will be created. In this case, it is the /app/postgresql/17.1/pg_dbcluster_1/data/ directory.
-U postgres - Specify the name of the database superuser that will be created during initialization. Here we explicitly specify the postgres user.
-W - Will prompt you to set a password for the superuser during initialization, providing additional security.
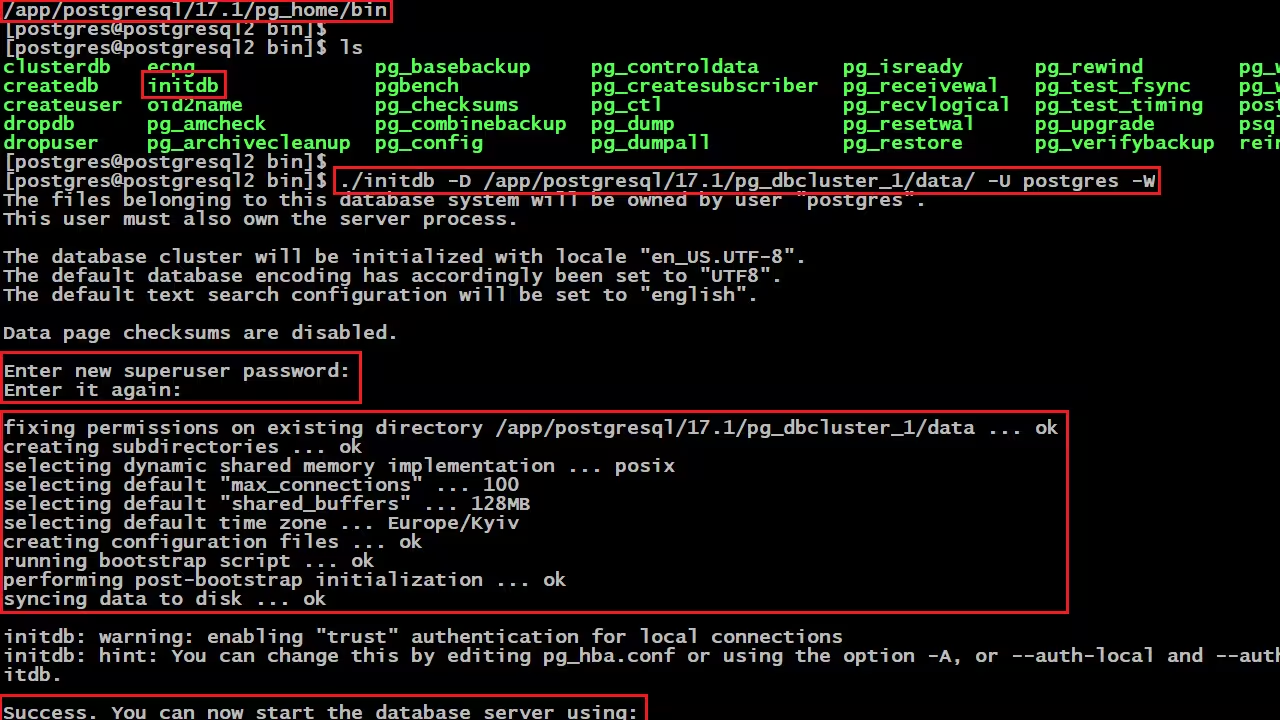
If after initialization you see the message - "Success. You can now start the database server using", then this means that the cluster is ready to start.
9. We edit the access file pg_hba.conf.
To open access to the PostgreSQL database cluster, you need to configure the necessary rules in the pg_hba.conf file. The pg_hba.conf file defines the authentication rules for connecting users.
The file is located in the directory where we initialized the cluster, in our case it is "/app/postgresql/17.1/pg_dbcluster_1/data". Open the file and make edits.
~$ vim /app/postgresql/17.1/pg_dbcluster_1/data/pg_hba.conf
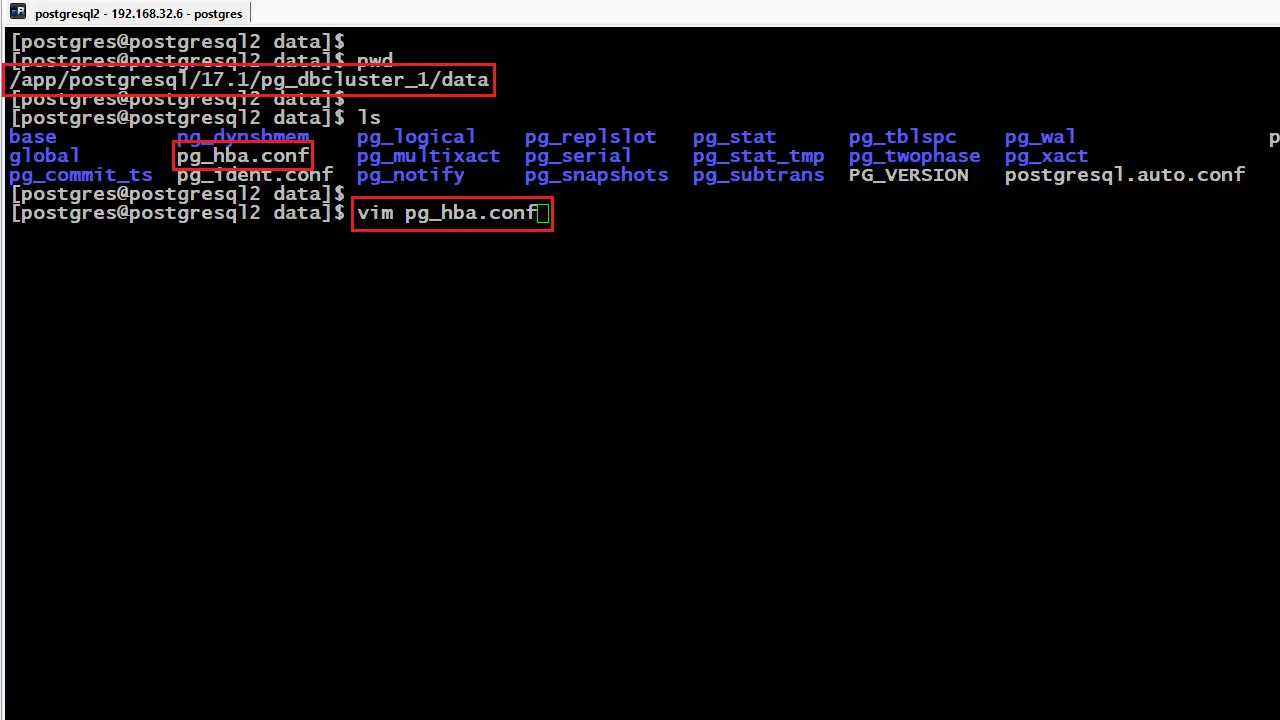
Add to the end of the file:
local all all password

host all all 0.0.0.0/0 password
With these two rules we allow all users to connect to all databases with a password.
10. We edit the postgresql.conf file.
To open access to the PostgreSQL cluster over the network, you need to configure the postgresql.conf file, which controls the main server parameters. This file is also located in the same directory as the pg_hba.conf file.
Open the file and make changes to the listen_addresses parameter.
~$ vim /app/postgresql/17.1/pg_dbcluster_1/data/postgresql.conf
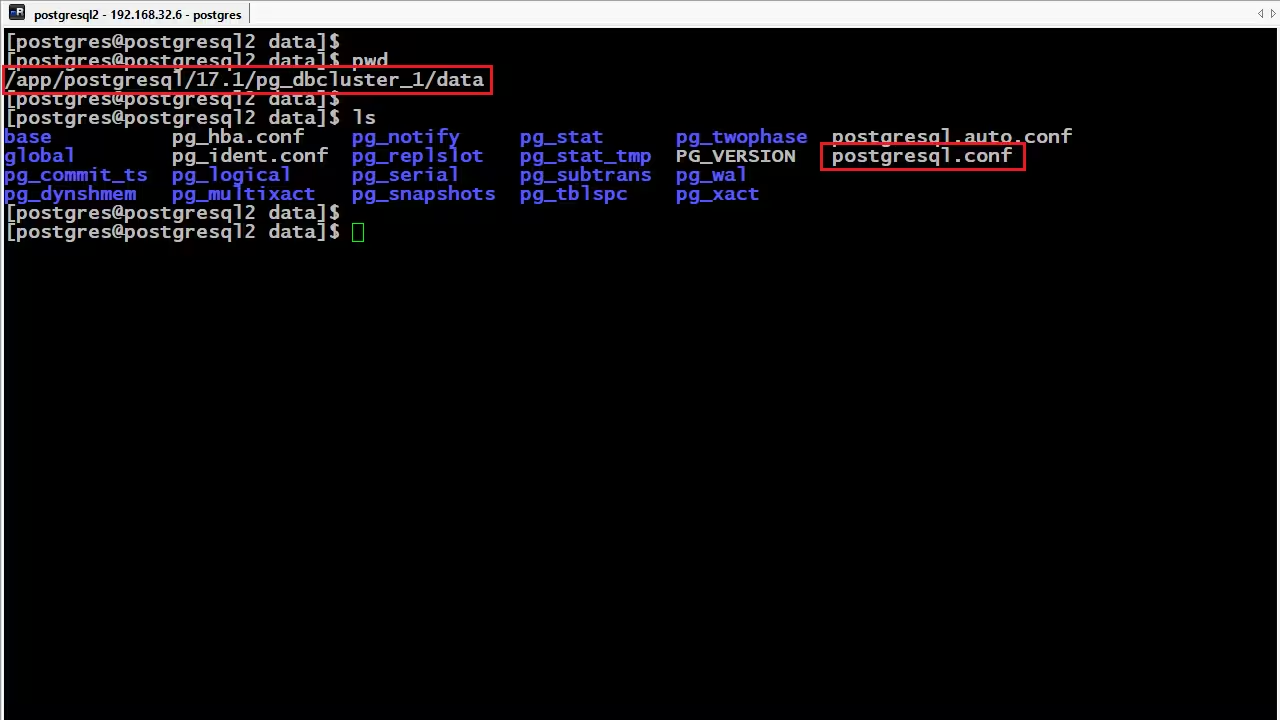
Find the listen_addresses parameter and specify the values instead of localhost to *.
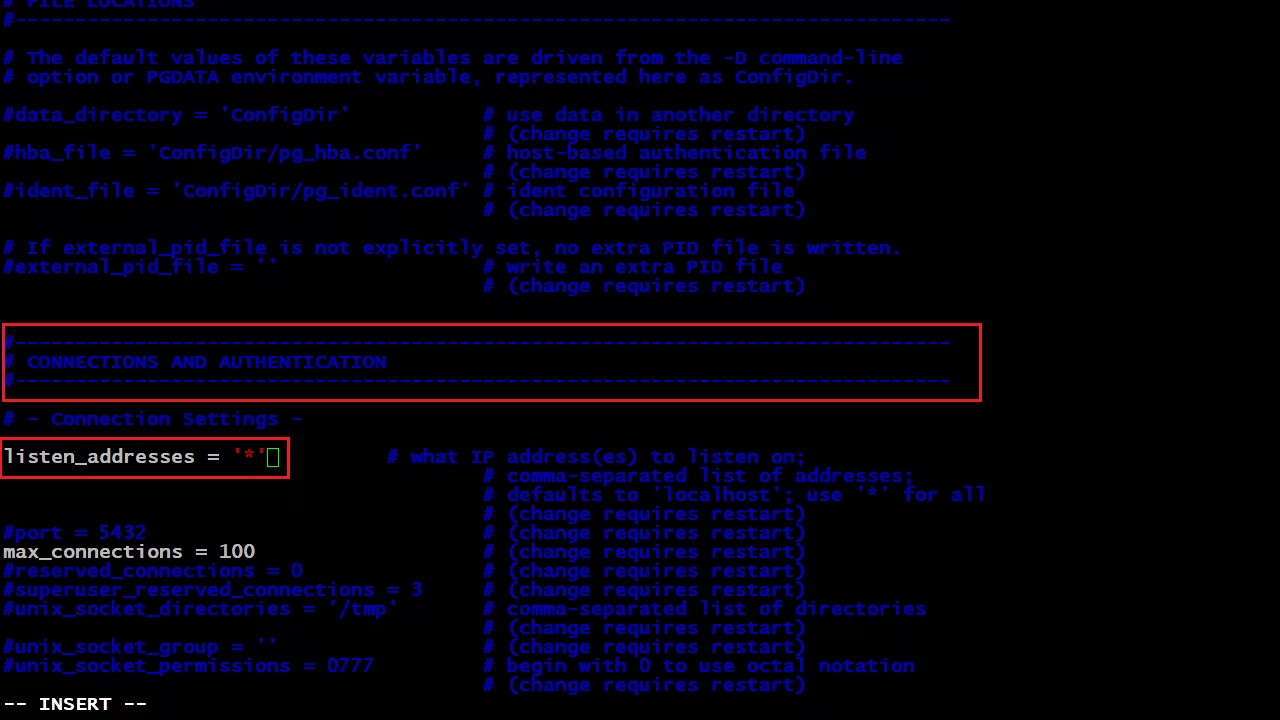
Values * - indicates that not only local server users, but also external clients can now connect to the cluster via the standard port 5432.
11. Creating environment variable files.
In the home directory of the postgres user, we create the pgsql_17_1.env file and write the necessary variables to it for a successful cluster launch. Variables are used to simplify work with the server and the database client, defining paths, user and connection parameters.
~$ vim /home/postgres/pgsql_17_1.env
We register variables.
export PGUSER=postgres

export PGPORT=5432

export PGPASSWORD='123'

export PGHOME=/app/postgresql/17.1/pg_home

export LD_LIBRARY_PATH=/app/postgresql/17.1/pg_home/lib

export PGDATA=/app/postgresql/17.1/pg_dbcluster_1/data

export PATH=$PGHOME/bin:$PGDATA:$PATH
Variable Descriptions:
- export PGUSER=postgres - Specifies the default user name used to connect to PostgreSQL.
- export PGPORT=5432 - Specifies the port on which the PostgreSQL server runs. The default is 5432.
- export PGPASSWORD='123' - Sets the password for the user (PGUSER).
- export PGHOME=/app/postgresql/17.1/pg_home - Specifies the directory where PostgreSQL files are installed, including executables, configurations, and libraries.
- export LD_LIBRARY_PATH=/app/postgresql/17.1/pg_home/lib - Specifies the path to the PostgreSQL libraries required for server processes and client utilities.
- export PGDATA=/app/postgresql/17.1/pg_dbcluster_1/data - Specifies the path to the PostgreSQL data directory, where database files, transaction logs, configurations, and other important files are stored.
- export PATH=$PGHOME/bin:$PGDATA:$PATH - Update the PATH variable.
12. We launch the cluster.
It's time to finally start the database cluster, we use the environment variables file pgsql_17_1.env and execute the command to start the cluster.
~$ pg_ctl start
If the cluster starts successfully, we try to connect to the cluster using the psql utility.
~$ psql
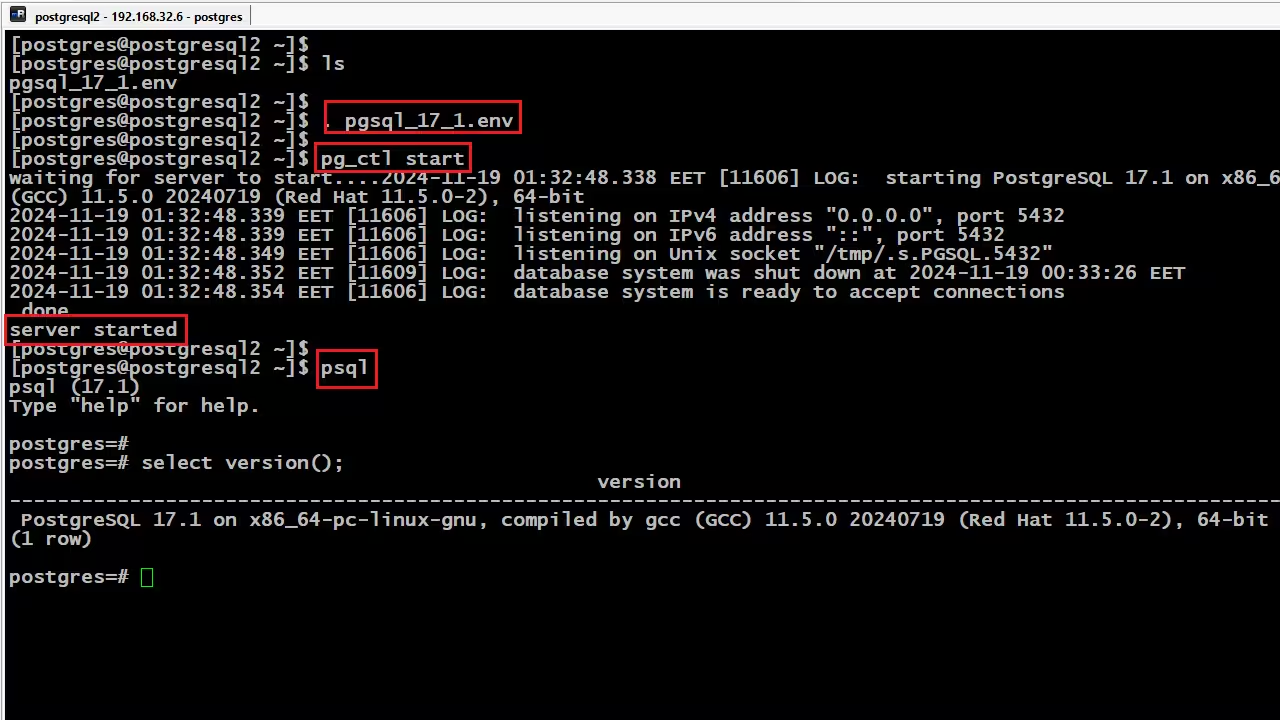
In the end, installing PostgreSQL from source on CentOS 9 gives you complete freedom to customize the database to your needs. We went through all the main stages: from preparing the system and downloading the source files to building, installing, and initially setting it up.
This method requires a little more time and effort than standard package manager installations, but it opens up opportunities for fine-tuning the system, optimizing performance, and taking advantage of the latest PostgreSQL features.
Now your system is ready to work with one of the most powerful DBMS. Stay updated, apply security patches regularly and don't forget about data backup to ensure stable operation of your database.
